

Key Points
- The fourth and final ending, called Voice of the Nightmare, requires finding puzzle pieces to unlock each room.
- You will also find the required clues within these rooms to use in the final camera room.
- Since this is the final ending, you get to piece together the mystery surrounding the Nameless Hospital.
The longest anomaly quest in Neverness to Everness is the Nameless Hospital quest. There are 4 endings to unlock here, and the final one is the Voice of the Nightmare ending.
Read More: NTE – How to Get an Offering to Evil Ending in Nameless Hospital Anomaly Quest
How to Get Ending 4 in Nameless Hospital Anomaly Neverness to Everness
The final ending doesn’t require finding items of the same type. Rather, you need to solve a puzzle and collect certain items for it. Before you begin, you need to clear the first ending to collect the Hospital Staff Elevator Card. With this, you can access the elevator on the same floor you spawned on. Enter the elevator and head over to floor 2F to collect a keychain.
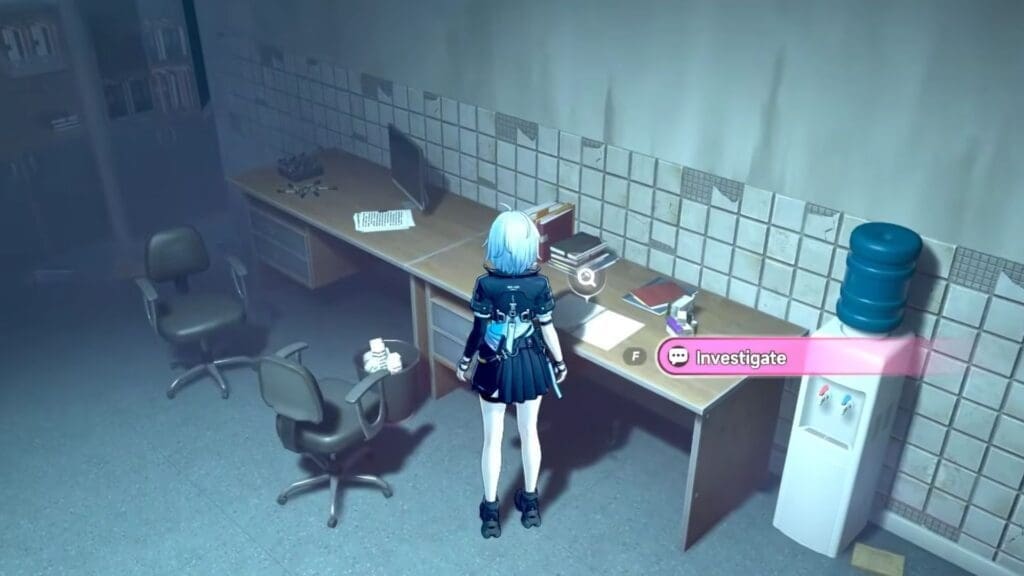
Keychain 2F Location
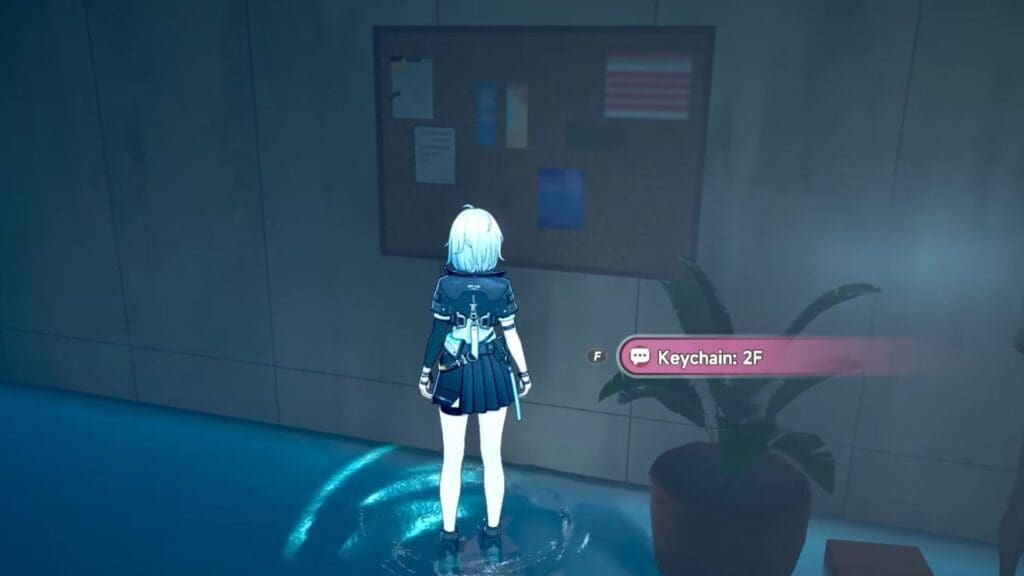
There’s something to note here before you go ahead and pick up this key. If your floor is submerged in water, you can skip ahead to find Jigsaw – Type IV. During my playthrough, the floor was dry, hence why I had to pick up the keychain.
After exiting the elevator, turn right, then left at the end. Go straight, turn left again, and enter the first closed door on your right past the double doorway. Flip the switch behind the door to reveal and collect the keychain from the board.
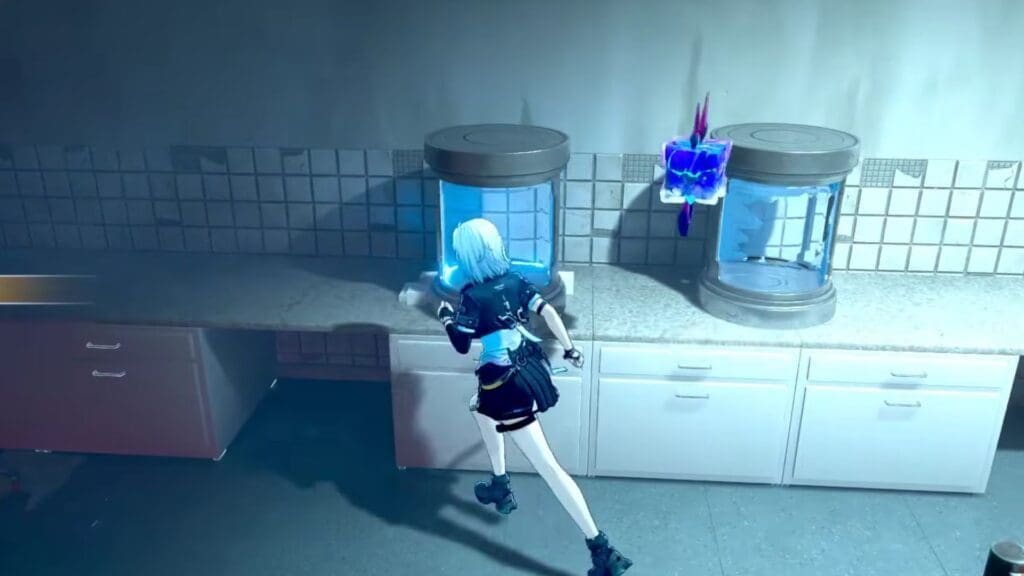
Jigsaw – Type IV Location
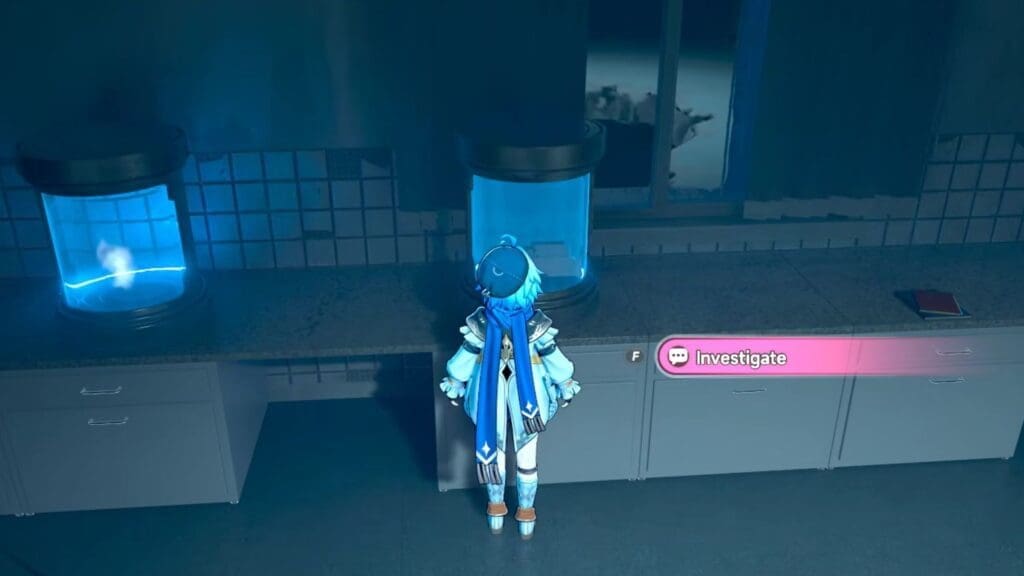
Exit, go left, then two rights. Enter the first door on your right after the double doors. Jump through the wall hole and climb the lockers. Use Esper Zero or Nanally for double jump. Unlock the safe for cash, then check the blue containers for Jigsaw – Type IV.
Jigsaw – Type I Location
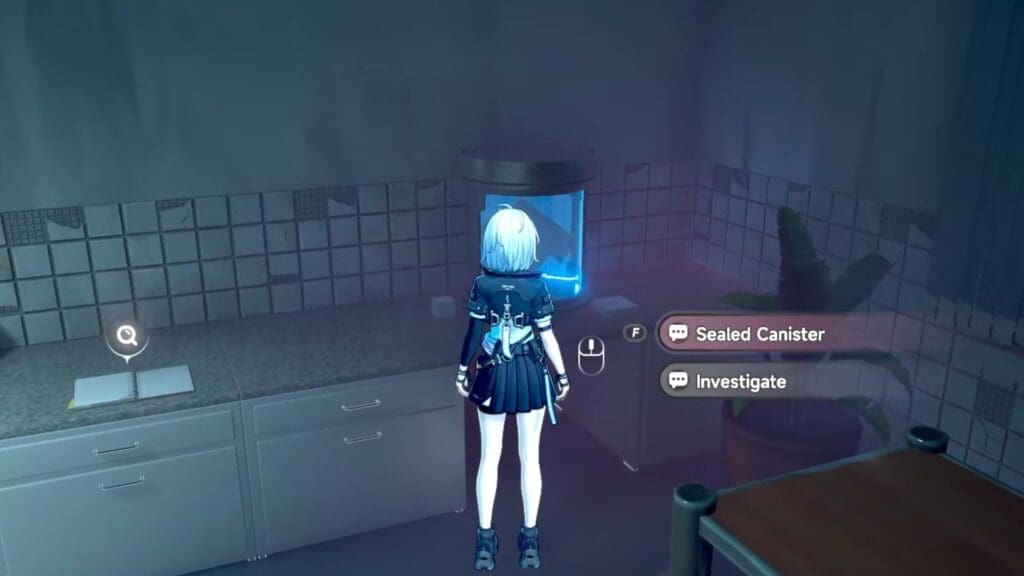
Take the elevator to 3F this time and take the Key – North District from the canister on your left. Enter the door beside the canister and enter the door on the right. Then, immediately enter the door on your right again to check the sealed canister and get Jigsaw – Type I.
V???’s Notes Location
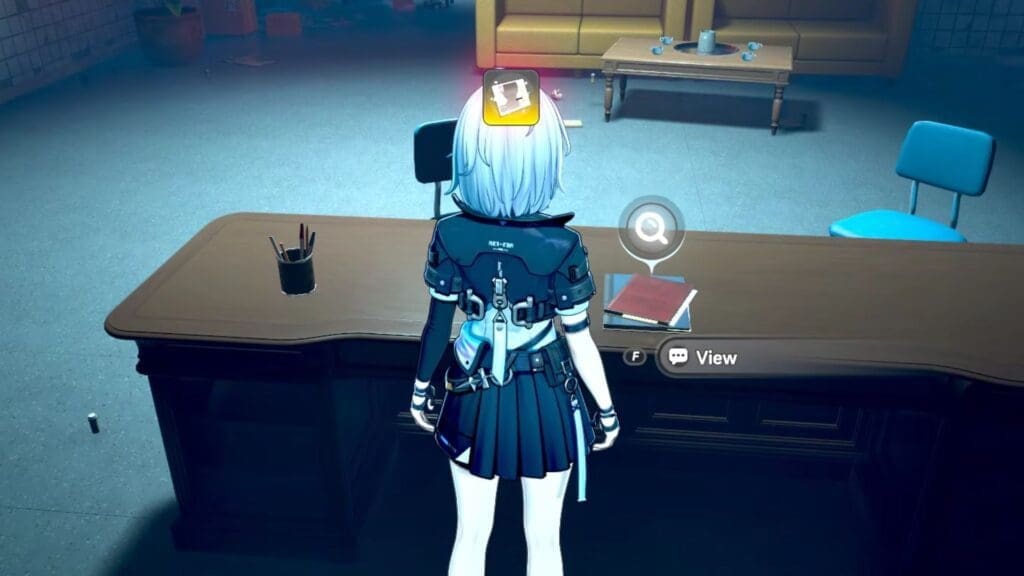
Exit the previous room to find a table in the middle of the room. Interact with it and put down the two Jigsaw pieces. Defeat the enemies that appear, then enter the doorway in front of the table. Turn right and walk through the fake wall, then interact with the item on the table.
At first, I couldn’t get the item in my inventory until I realised that I had to interact with the document 4 times. Each time I check the document, I notice changes appearing around me. Once done, I found this item added to my inventory.
Anomaly Experiment Clue III Location
Exit the jigsaw table room and take the exit back out. Go down the corridor, turn right, then enter the first doorway on the right. Investigate the paper on the table opposite the doorway to get the Anomaly Experiment Clue III.
Jigsaw – Type II Location
Exit the room and enter the door right opposite the room you just left. Interact with the canister on the far right of the room and ask the anomaly to come with you. Then, exit the room and go left, then take the first right, then go right again. Enter the door on your left and interact with the canister on the far left to turn the anomaly into a jigsaw. Place the jigsaw into the puzzle table to unlock the next area.
Anomaly Experiment Clue VI Location
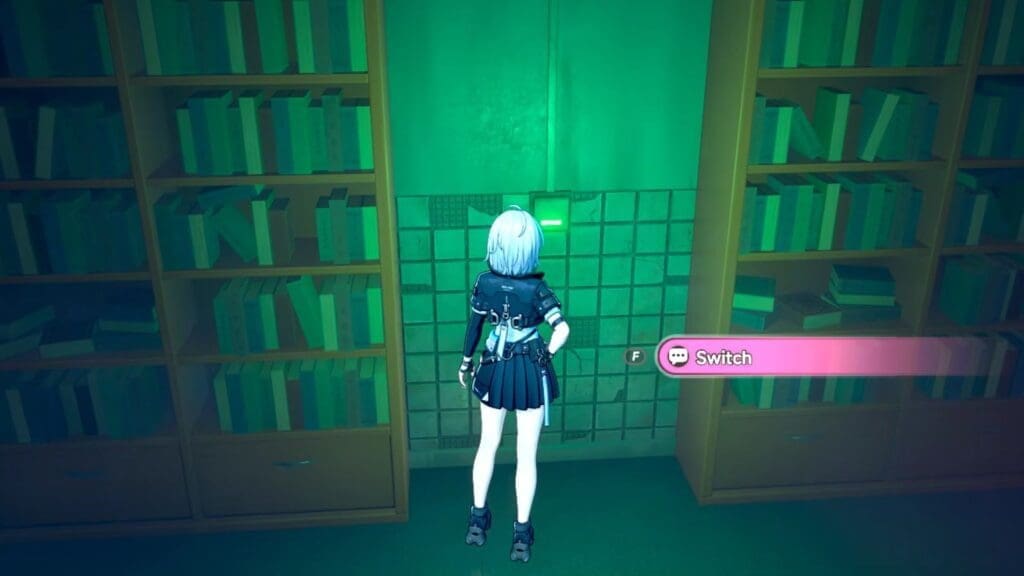
Exit out the same door you came in from and go to the end of the corridor. From there, turn right and go to the end. Enter the door on your left and interact with the light switch on the wall.l. You need to use the switches in a particular order for the puzzle to work.
- Tap the switch twice quickly.
- Tap the switch once and wait a second.
- Tap the switch once and wait a second.
- Tap the switch once and wait a second.
- Tap the switch once and wait a second.
- Tap the switch twice quickly.
If done correctly, the bookcase beside you will open up. Enter the secret room and collect the Anomaly Experiment Clue VI from the computer in the corner of the room.
Place the Clues
Take the elevator back to 2F and enter the camera room in the main lobby. The items you need to place inside the cameras are:
- Nightmare Voice Clue I (V???’s Notes)
- Anomaly Experiment Clue III
- Anomaly Experiment Clue IV
After placing all the clues, you will get Ending 4 – The Voice of the Nightmare. Watch the rest of the cutscene to complete the quest.
Read More: Neverness to Everness – How to Get Furniture
FAQs
What rewards will I get for completing the quest?
You will receive 5,000 Fons and 50 Annulith if this is the only ending you have completed. If you have unlocked all 4 endings, then you will get 180,000 Fons and 200 Annuliths.
The switch sequence doesn’t work for me. What do I do?
Make sure you are giving enough time between each switch press to unlock the secret. If it doesn’t work, then try doing the sequence twice and see if it helps. If that still doesn’t work, restart the game and try again.
How do I know if the floor will get flooded or not?
The type of enemy that spawns in the main lobby of the third floor will signify whether your floor will be flooded or not. Enemies with several flames emitting off them will not flood the floor, while enemies with a more rounded appearance will keep the floor wet.
I can’t make the jump up to the top floo. What do I do?
Use Nanally or Esper Zero and use their jump skill, then immediately transition to another Esper and jump again to get to the top.