

Key Points
- This puzzle is part of the Dragon’s Stone Chamber Ruins quest.
- You will encounter this puzzle at Hernand Highlands.
- Solving the puzzle involves rotating the stone dials to the correct position to reveal the treasure room.
Crimson Desert is not shy of involving puzzles across the regions. Each time you pick up certain quests, you are sure to run into a puzzle to solve. Once you reach the Dragon’s Stone Chamber, you need to figure out how to turn the stone dials to complete the related quest and get your rewards.
Read More: Crimson Desert – Find the Room the Key Opens (Mystical Key Quest Guide)
Crimson Desert – Dragon’s Stone Chamber Puzzle Overview
| Location | Hernand Highlands |
| Area | Inside Dragon’s Stone Chamber |
| Rewards | Memories of Abundance |
How to Find the Dragon’s Stone Chamber
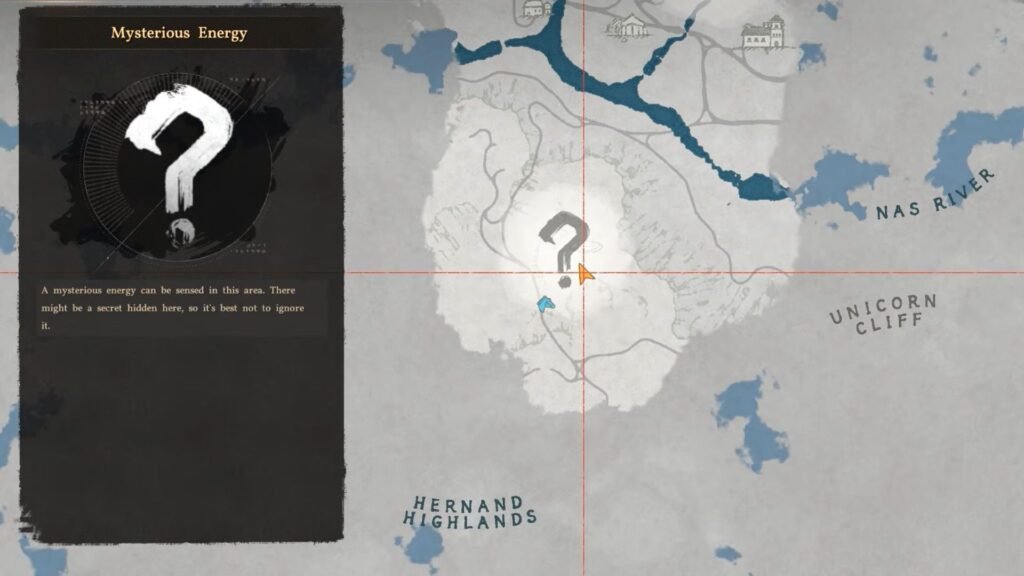
You will find the chamber entrance at the Hernand Highlands, somewhere along the cliff walls. This location is easily accessible if you head south from your home. You could also check your map to find the Mysterious Energy marker in the southern section of the region.
While traveling south to southeast, keep an eye out for a large ravine. You will spot the chamber door inside the crevice of the cliff while facing northwest. To reach the chamber door, you could either fall and glide across or fall to the bottom and climb up.
How to Unlock the Dragon’s Stone Chamber
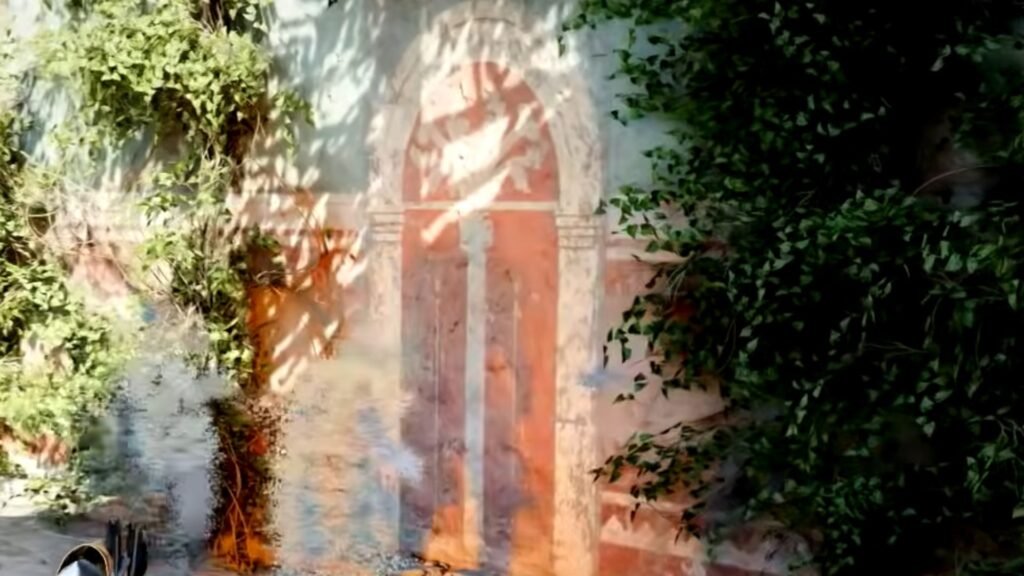
Once you reach the door, use Blinding Light to burn all the vines blocking the entrance. After that, use your lantern to find all the memories in the surrounding area, then activate the memories using Visione. Watch the memory, then push the painted door on the mural to get inside the chamber.
How to Solve the Dragon’s Stone Chamber Puzzle
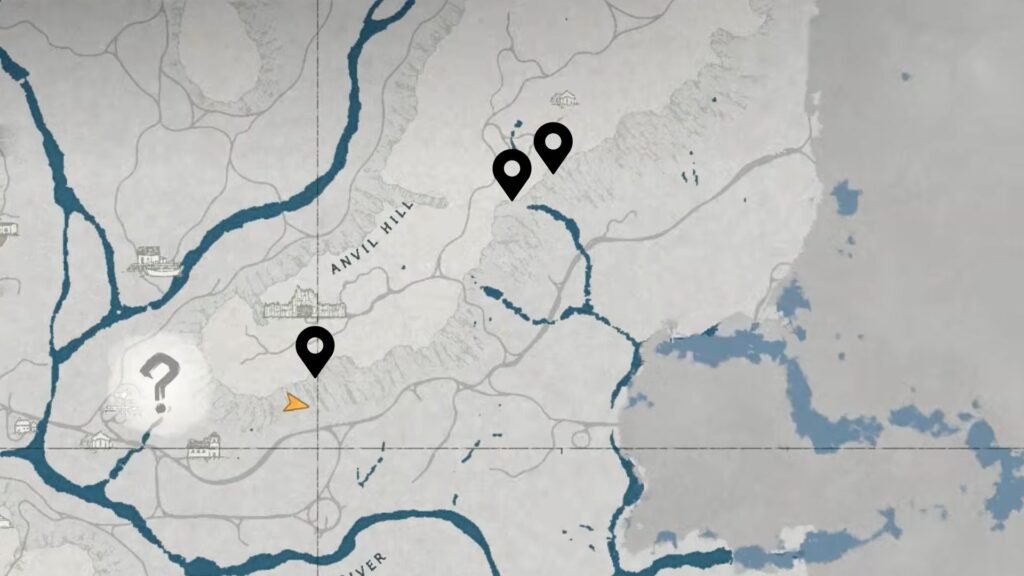
While investigating the room, you will find a pit in the middle with three stone wheels. On the walls, you will find maps with marked locations. You need to match the locations to your map and head over there to find the solution. All clues are found on the southern mountain wall of Anvil Hill, as marked on the map above.
After noting the mural solutions, return to the Dragon’s Stone Chamber and align each stone wheel as shown. All you need to do is step up to each wheel and rotate them in the correct position. There is no particular order to select the wheels, as long as the image on each wheel faces the right direction.
If correct, a cutscene will reveal an unlocked door. Proceed to claim your rewards. The solutions are given below.
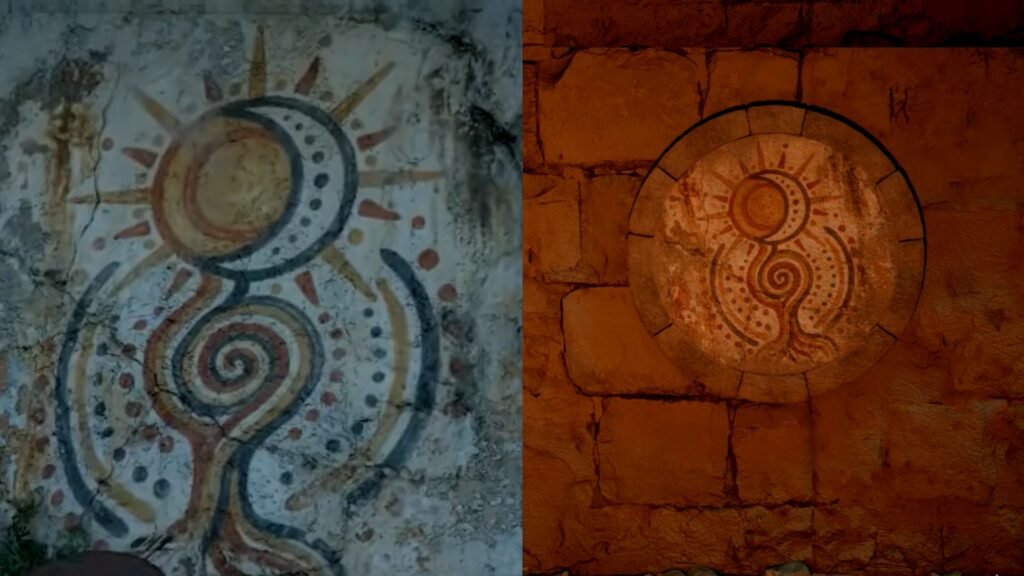
Dragon’s Stone Chamber Solution #1
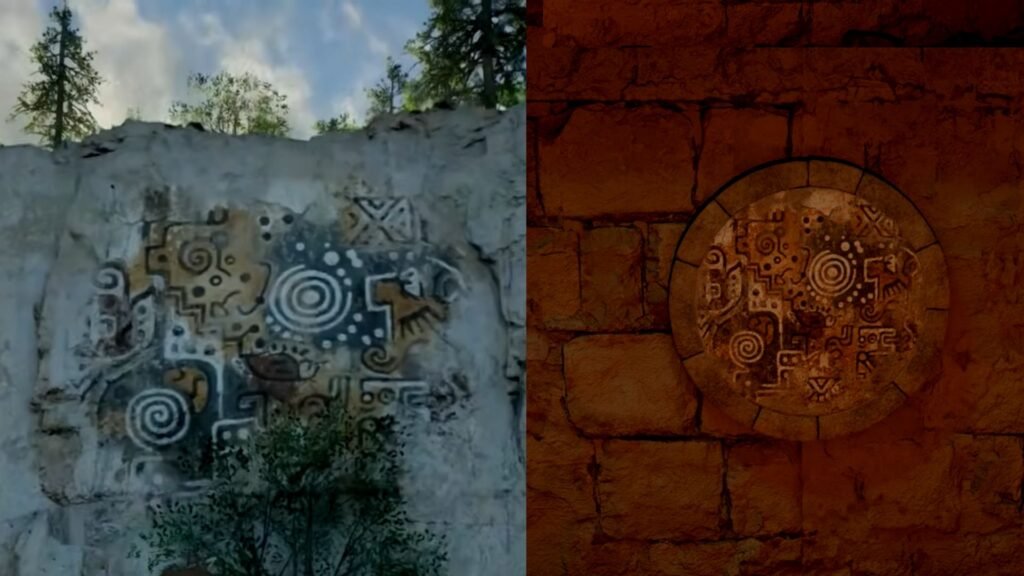
Interact with the stone wheel that has the image above. You will get a notification to use your keys to rotate the wheel. Rotate the stone wheel a bit to the left or right until the image on the wheel matches the one on the mural.
Dragon’s Stone Chamber Solution #2
Again, grab on to the stone wheel my stepping up to it and interacting with it. You will get the notification to turn it in either direction. Keep turning it until the image matches the one on the mural.
Dragon’s Stone Chamber Solution #3
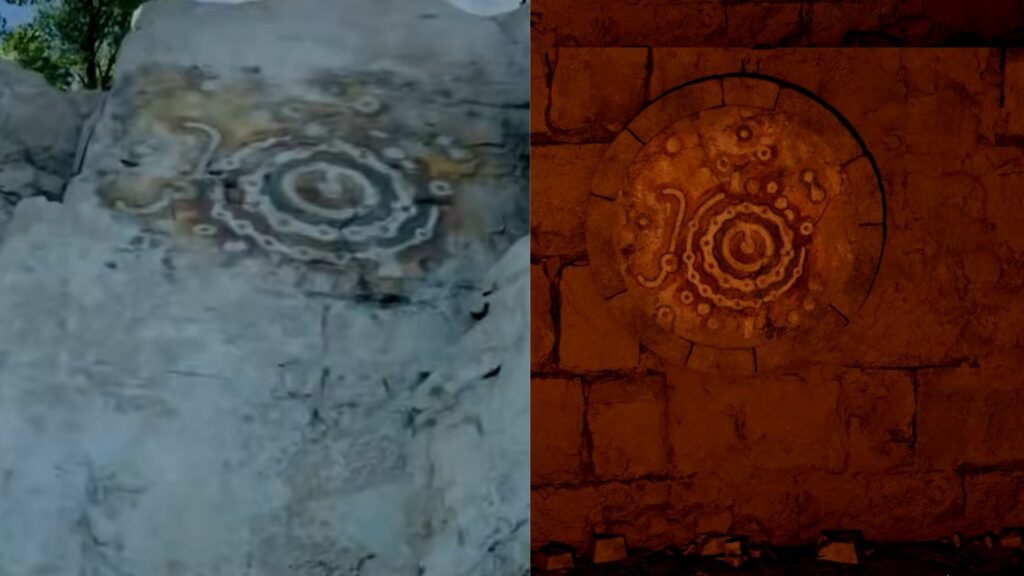
Once you are done with the other two stone wheels, walk over to the last one and interact with it to rotate it. The image should match the mural as shown above.
Read More: Crimson Desert – Keyboard or Controller? Guide
FAQs
What rewards do I get for solving the puzzle?
You will receive the Memories of Abundance abyss artifact for solving the Dragon’s Stone Chamber puzzle. This artifact grants access to new locations and additional game knowledge.
What do the Memories of Abundance do?
Using the Memories of Abundance will reveal knowledge of all Hidden Places around Hernand Highlands. This will reveal the Azure Moon Labyrinth and also give you 7 more pieces of knowledge.
Do I need any special items or skills to solve the puzzle?
No, you need to have just the lantern and the Visione skill to gain entry into the puzzle room, but you don’t require anything else to solve the puzzle.