

Key Points
- The secret safe is located on top of the broken rail tracks while exploring Western Backlot.
- You will get to this location as part of The Bookkeeper by Tinsel Bros main story quest.
- Solving the safe puzzle is similar to solving lockpicking puzzles.
In MOUSE: P.I. For Hire, you might miss a couple of collectibles if you are in a rush to complete the main story. But if you stick around, you are bound to find rare items and collectibles. As you explore the Western Backlot for the Bookkeeper, you will encounter a locked safe on top of some broken rail tracks.
MOUSE: P.I. For Hire – Western Backlot Safe Overview
| Chapter | “The Bookkeeper” by Tinsel Bros |
| Objective | Sift Through the Bookkeeper’s Belongings |
| How to unlock | Solve the lockpick puzzle |
How to Unlock the Safe Guide
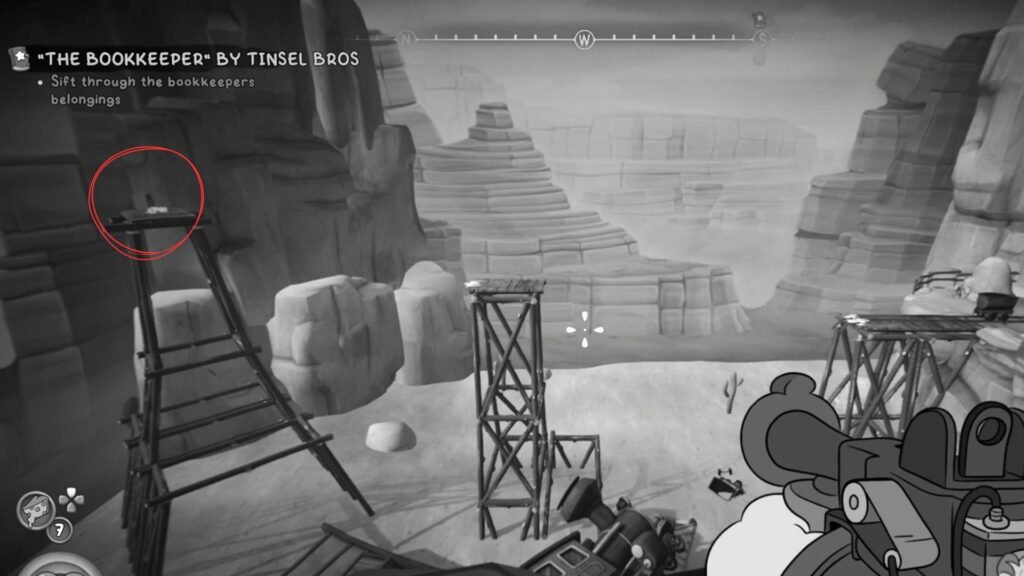
The Western Backlot secret safe is located within “The Bookkeeper” by Tinsel Bros, the main chapter. During the chapter, you are tasked with chasing down the Bookkeeper. During the objective to Sift Through the Bookkeeper’s Belongings, you will end up at the edge of the mountain with the Bookkeeper running away.
After you exit the tunnel into the open expanse of the cliff, go left to find Jane’s tombstone. If you turn to your right and look across at the broken railway platforms, you will find a lone safe on the leftmost platform. Before that, I found a baseball card collectible down the path behind the tombstone, so collect that before moving on.
Reaching the Safe
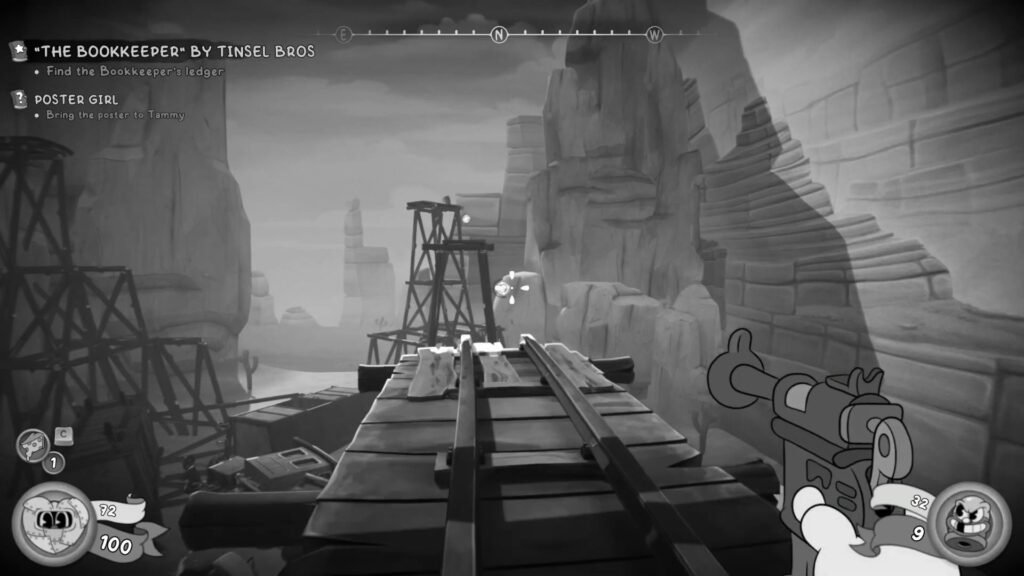
Head down the slope to your right and deal with the enemies that will emerge from the house ahead. Once that is done, drop down to the rail tracks just below the cliff. The next part baffled me, as it took a while to figure out how to get across.
Look ahead to find a white spot on the right side of the platform and shoot at it with your gun. A grapple hook will drop down. Use it to get across. Do it a second time to reach the safe.
Solving the Safe Puzzle
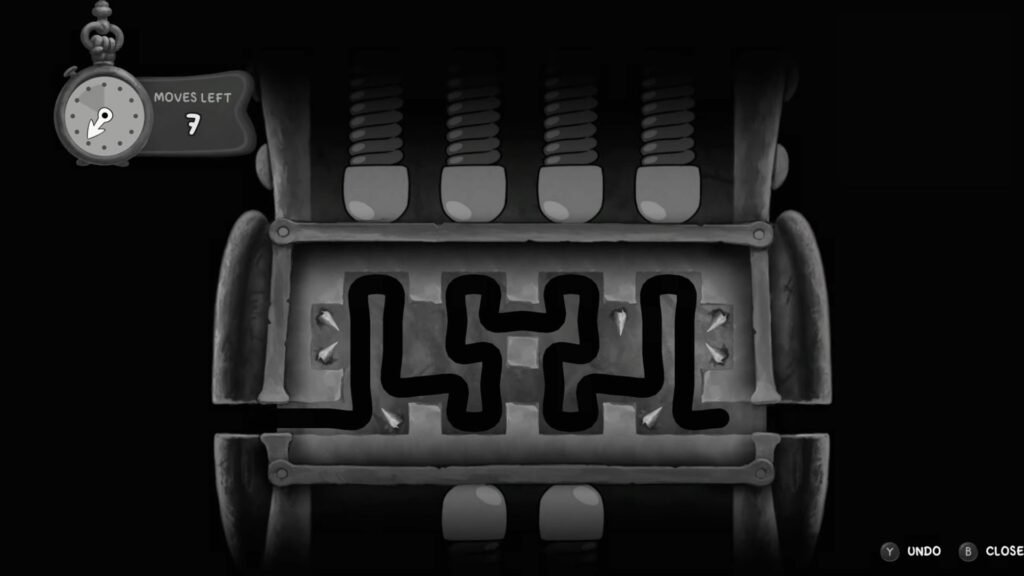
The puzzle solution is pretty simple, but you have to do it under 49 moves. There’s also a timer to keep track of, so that’s something to check out frequently. To know how I solved the puzzle, you can check out the image above for the solution.
You have to hit the upper leftmost button first, then the button to the bottom right, before pressing the button above. While heading up, make sure you don’t block the entryway to the area on the right. Then, continue right and up, then go down. Finally, hit the rightmost top button and exit to unlock the safe.
FAQs
What happens if I run out of time?
The safe will be locked, and you can’t get the item inside it.
What’s inside the safe?
You will find a schematic collectible inside the safe.
Is the safe missable?
No, you will find the safe during exploration; you just need to keep an eye on your surroundings before moving on.