
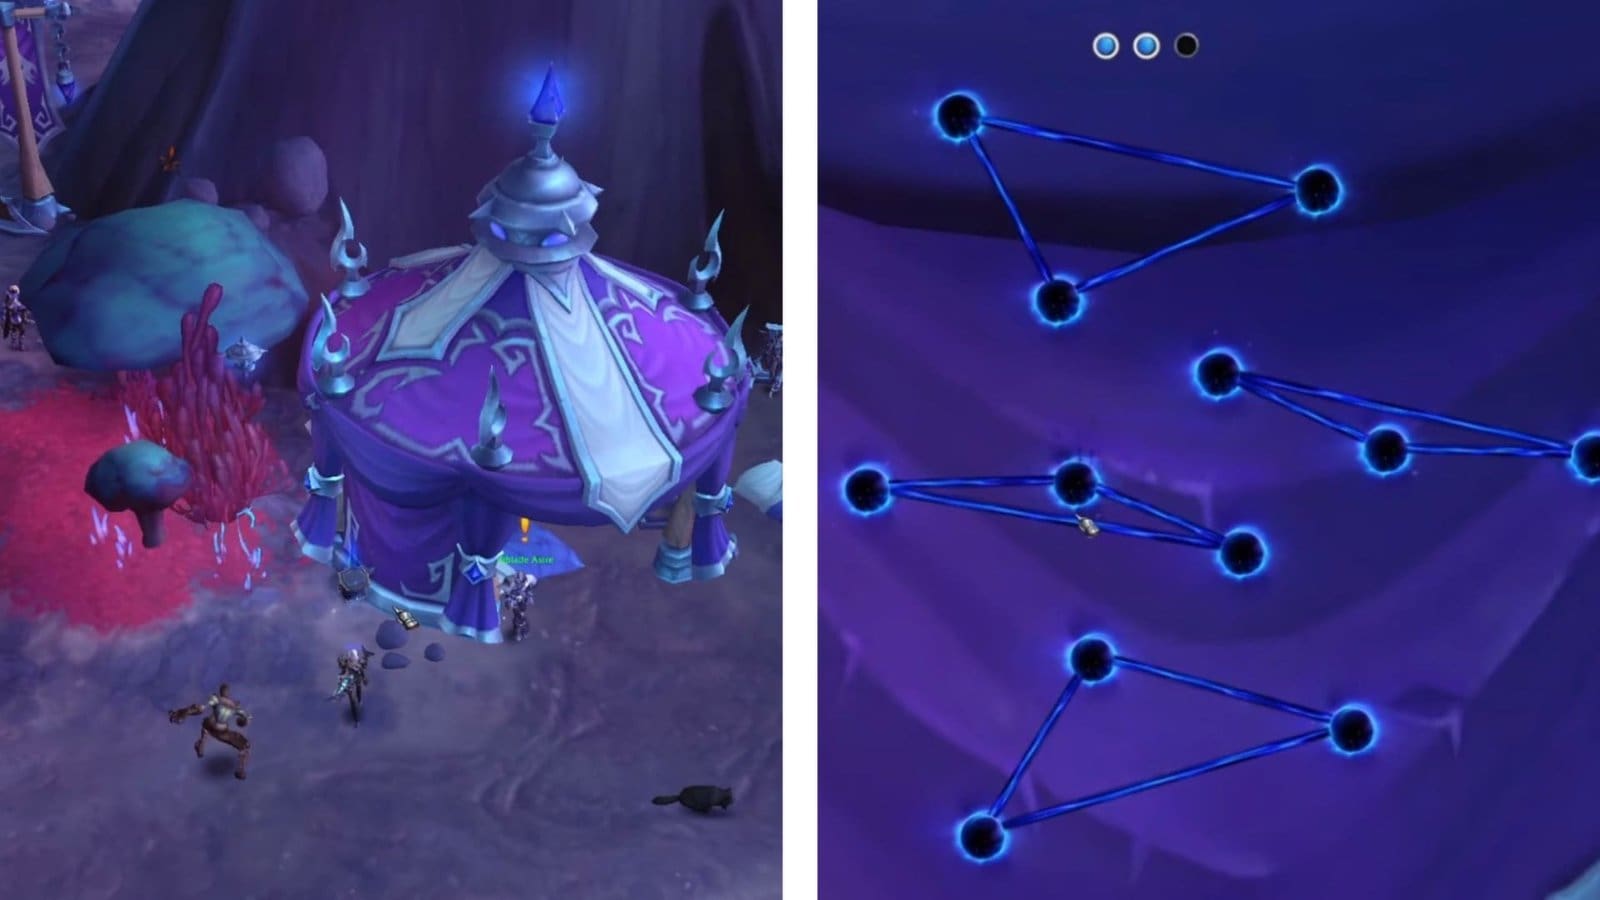
Key Points
- You must solve three puzzles to complete the Deciphering Darkness quest in Wow Midnight.
- To solve them, you need to untangle the overlapping, connected lines to form four separate triangles.
- Be careful not to back out when you’re solving the puzzles, as it will reset the entire process.
Solving the triangular puzzles during the Deciphering Darkness quest in WoW Midnight is quite the challenge, as you need to form separate triangles by untangling the overlapping, connected lines. You need to complete all three puzzles consecutively, as backing out will reset them. So, here’s exactly what you need to do to solve the puzzles in the Deciphering Darkness quest.
Read More: WoW – Midnight World Tour Complete Quest Guide
WoW Midnight – Deciphering Darkness Quest Overview
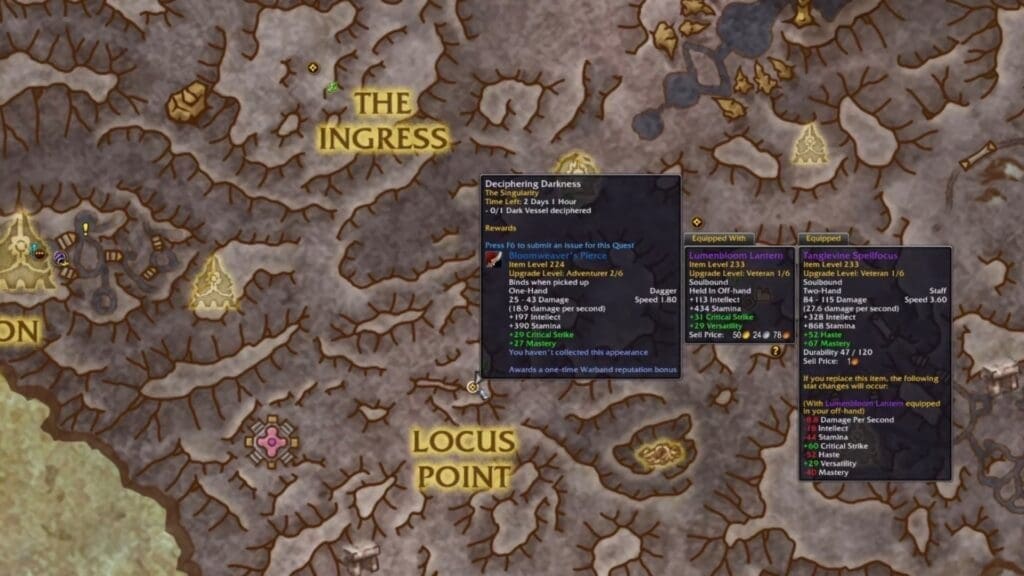
| Location | Locus Point in Voidstorm |
| Puzzles | Three |
| How to solve | Untangle the overlapping lines and form four separate triangles. |
Deciphering Darkness Puzzle #1
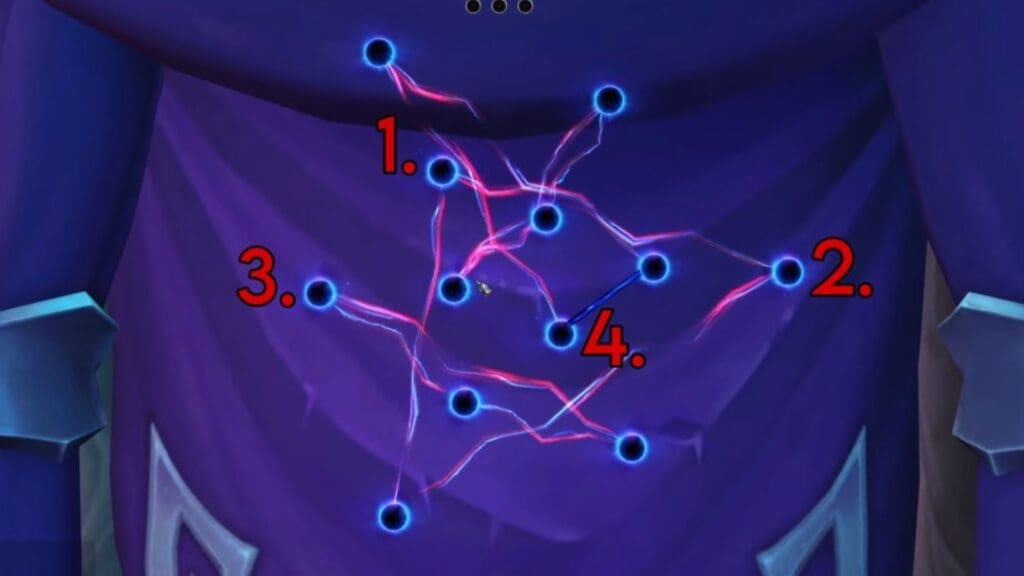
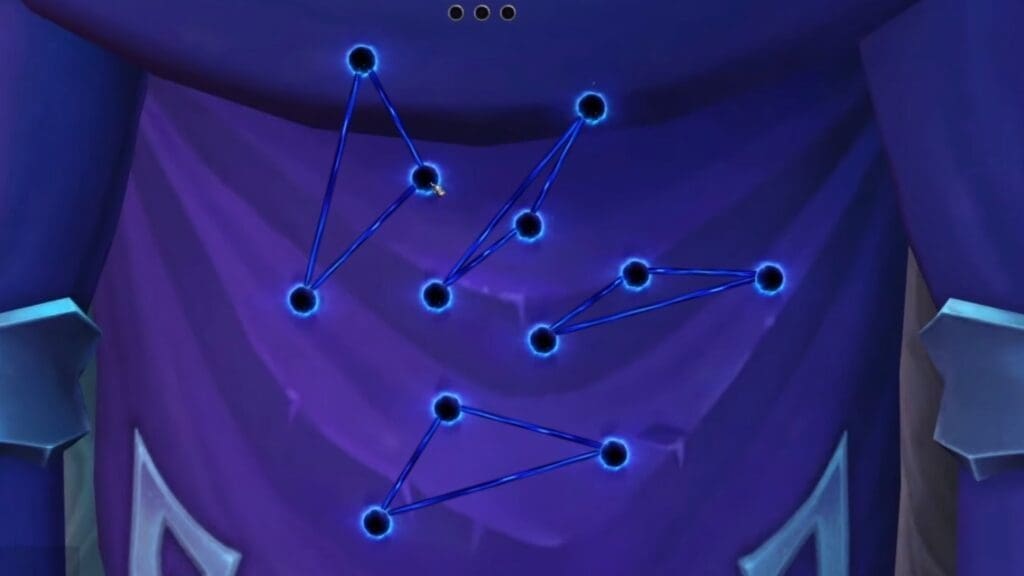
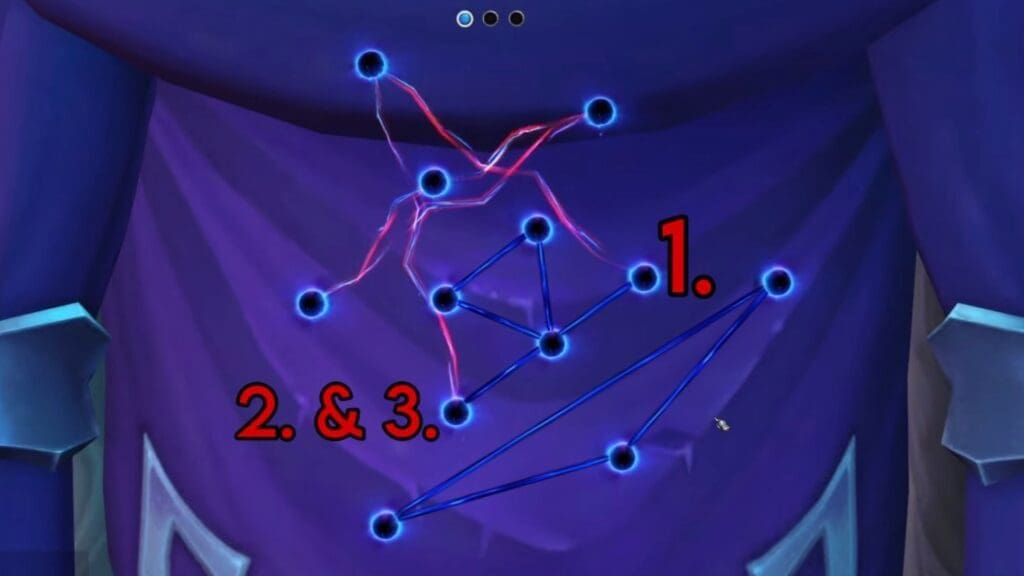
The strategy for all the puzzles is to untangle the connected lines so they do not overlap, forming separate triangular shapes. So, for the first puzzle, apply the same strategy, but if you’re confused, take a look at the image above with the markers, and check out the explanation given below:
- Click the blue orb just below the one in the top-left corner.
- Then, click the one on the far right.
- Next, click the one on the far left.
- Lastly, click the one located near the bottom right, just above the separate triangle.
If you can form four separate triangles successfully, as shown in the image above, you’ve solved the first puzzle. Take a look at the markers in the image above and solve the puzzle accordingly. Once done, move on to the next puzzle, which needs untangling.
Deciphering Darkness Puzzle #2
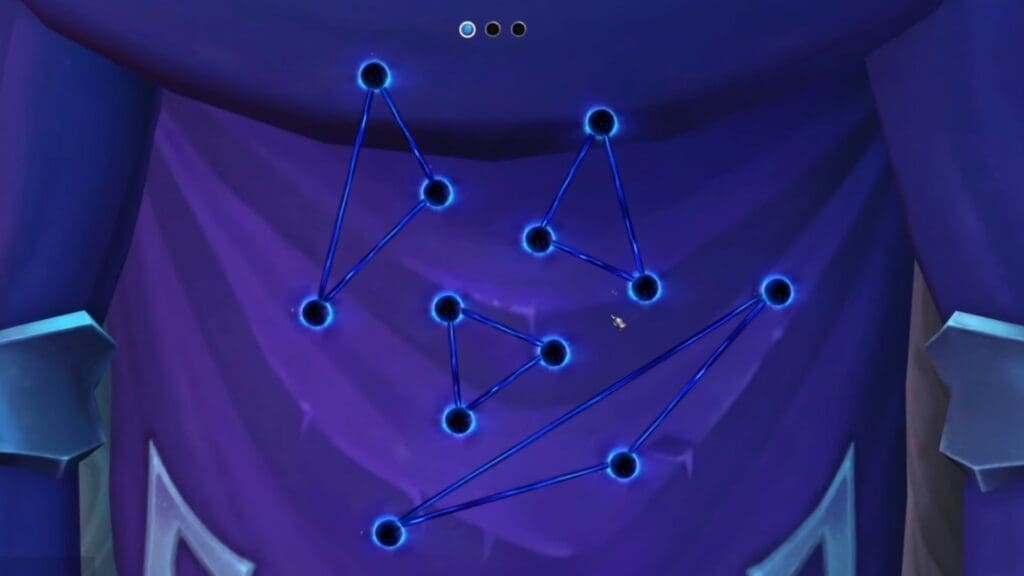
For the next Deciphering Darkness puzzle, the strategy remains the same. View the puzzle as separate triangles connected by overlapping lines, and untangle them. In this one, some triangles are already formed beforehand, so here’s what you need to do:
- First, click the blue orb that’s parallel to the one on the far right side.
- Next, click the one above the blue orb in the bottom-left corner.
- Click the new orb at the same location as the second one again to solve the puzzle.
Like the first puzzle, four separate triangles will come into a formation, as showcased in the image above, and that’s your cue to move on to the final puzzle required for this quest in WoW Midnight.
Deciphering Darkness Puzzle #3
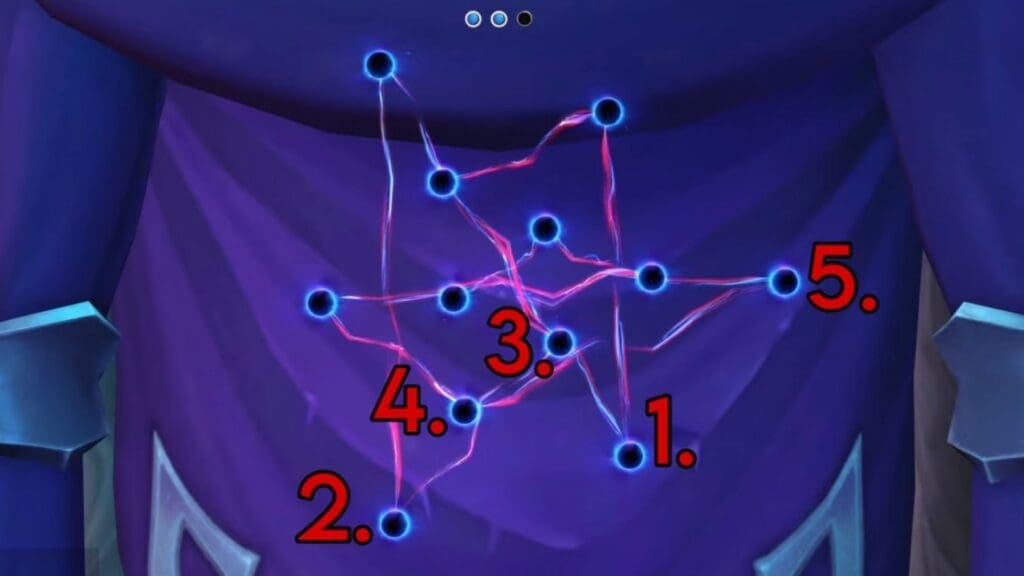
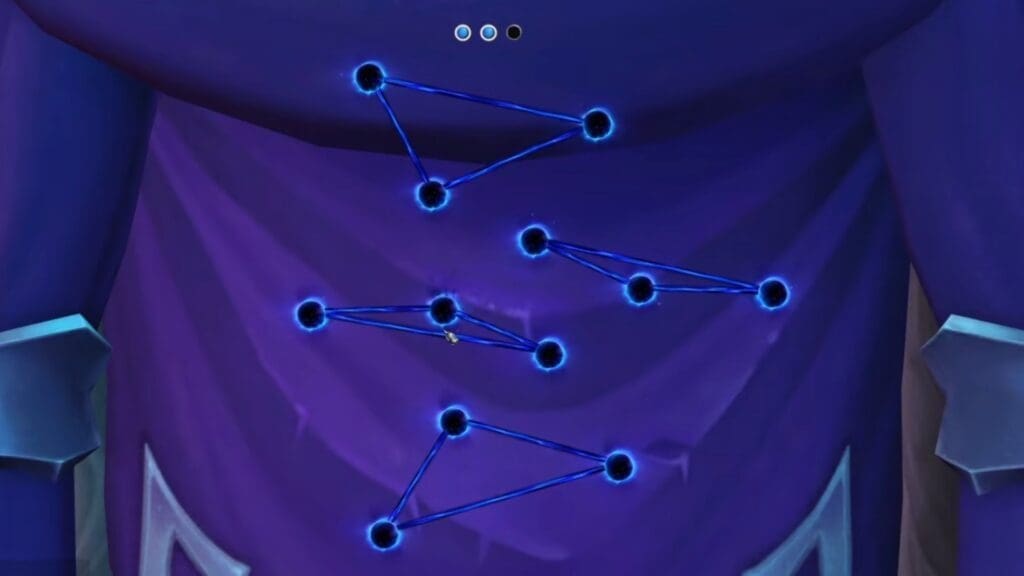
The last puzzle in the Deciphering Darkness quest doesn’t come with solved triangles beforehand, so you need to work your brain for this one. Apply the same strategy to untangle the overlapping lines and form separate triangles until all triangles are distinct. Here’s what you need to do:
- First, click the one in the bottom-right corner.
- Do the same with the bottom-left one, located beside the first.
- Next, click the orb located just above the one in the bottom-right corner, a bit towards the left.
- Now, click the one directly to the bottom left of the previous one.
- Lastly, click the one on the far right side to complete the puzzle.
Doing all three puzzles will complete the Deciphering Darkness quest in WoW Midnight. This may take some trial and error, so if you get stuck, refer to the images above and solve the puzzles accordingly.
Read More: WoW Midnight – How to Get the Nether-Warped Drake Mount
FAQs
What do I get for completing this quest?
For completing the Deciphering Darkness quest in WoW Midnight, you’ll obtain the Bloomweaver’s Pierce Dagger (One-Hand).
What happens if I reset the puzzle?
If you reset any of the puzzles at anytime during the quest, you’ll have to solve all three puzzles again. Ensure you solve them correctly without resetting them multiple times.
There’s a square formation instead of a triangular one during the third puzzle. What should I do?
For the square formation, swap the second and fifth blue orb until they form parallel vertical lines. This is harder than the triangular one, so be prepared to spend some time on it.
